

Wellhead tools are among the most critical pieces of equipment in oil and gas well operations. They provide structural support, seal the wellhead, control pressure, and ensure operational safety. The installation quality of wellhead tools has a direct impact on safety and the smooth execution of drilling, completion, and production activities. Therefore, following a standardized installation process is essential. This article explains the entire workflow—from preparation to installation and final acceptance—to help engineering personnel improve operational quality and safety management.

Pre-Installation Preparation: Ensuring Equipment and Site Compliance
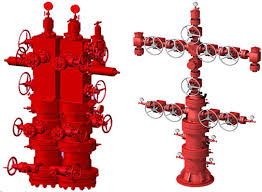
Pre-installation preparation forms the foundation of the entire process. The first step is to inspect all tools, including slips, casing heads, flanges, valves, and elevators, making sure they are intact and free from cracks or deformation. Specifications and dimensions must be confirmed to match the wellhead size. Next, all sealing components—such as O-rings and metal seal rings—should be checked for aging or damage, and replaced if necessary.
The work area should also be cleaned before installation. The wellhead region must be free of liquids, grease, or debris to ensure a safe and accessible operating environment. Personnel should wear protective clothing, gloves, and helmets, while tools such as wrenches, lifting devices, and slings should be prepared in advance.
Installation Process: Executing Each Step with Precision
The installation of wellhead tools must follow a sequential and standardized procedure, as each step influences the overall performance.
1. Installing the Bottom Casing Head
The casing head forms the foundation of the wellhead system. It must be aligned vertically with the centerline of the wellbore and securely fitted onto the casing. Before installation, the casing surface and the inner walls of the casing head must be cleaned and lubricated. Flange bolts should then be tightened symmetrically to ensure uniform sealing.
2. Installing Slips, Tubing Heads, and Upper Components
After the casing head is in place, slips or tubing heads are installed. Special attention must be given to the cleanliness of sealing grooves and correct placement of sealing rings to avoid future leakage. All bolts must be tightened according to the specified torque to prevent misalignment or insufficient compression.
3. Installing Wellhead Valves and Pressure-Control Components
Valves are crucial for pressure control and flow regulation. They must be installed in the correct orientation and ensure smooth switching operations. For high-pressure wells or gas wells, additional components such as chokes and flow-control plates may be required, and their pressure ratings must match the wellhead’s specifications.
4. Checking Alignment and Connection Stability
Once all components are installed, the tool–pipe string clearance should be checked to ensure there is no sticking. All flanges and bolted connections must be inspected for stability and proper engagement.
Post-Installation Testing: Ensuring Tightness and Functional Integrity
After installation, a series of performance tests must be carried out:
Leak Testing: Pressurize the system to check for leaks at flanges, valves, and seal points.
Function Testing: Simulate valve opening, closing, and flow regulation to confirm operating smoothness.
Pressure Stability Testing: Verify the system’s performance under working pressure, ensuring no vibration or seepage occurs.
All pressure values, testing times, and results should be recorded for documentation and future verification.
Final Acceptance and Handover: Ensuring Safe Commissioning
Once all tests have been successfully completed, the system undergoes final acceptance. This includes reviewing installation logs, verifying equipment specifications, and confirming test reports. After the inspection is approved, the installation team and the operator complete the handover, and the wellhead tools can officially be put into service.
Conclusion
The installation of wellhead tools involves multiple detailed steps—including preparation, installation, testing, and acceptance—each of which directly affects the system’s safety and reliability. By following standardized procedures and ensuring installation is carried out by trained personnel using compliant tools, operators can reduce failures, extend equipment lifespan, and maintain safe and efficient well operations.


